Showing posts with label tutorial. Show all posts

Monday, March 12, 2012

How to: Safari in Style

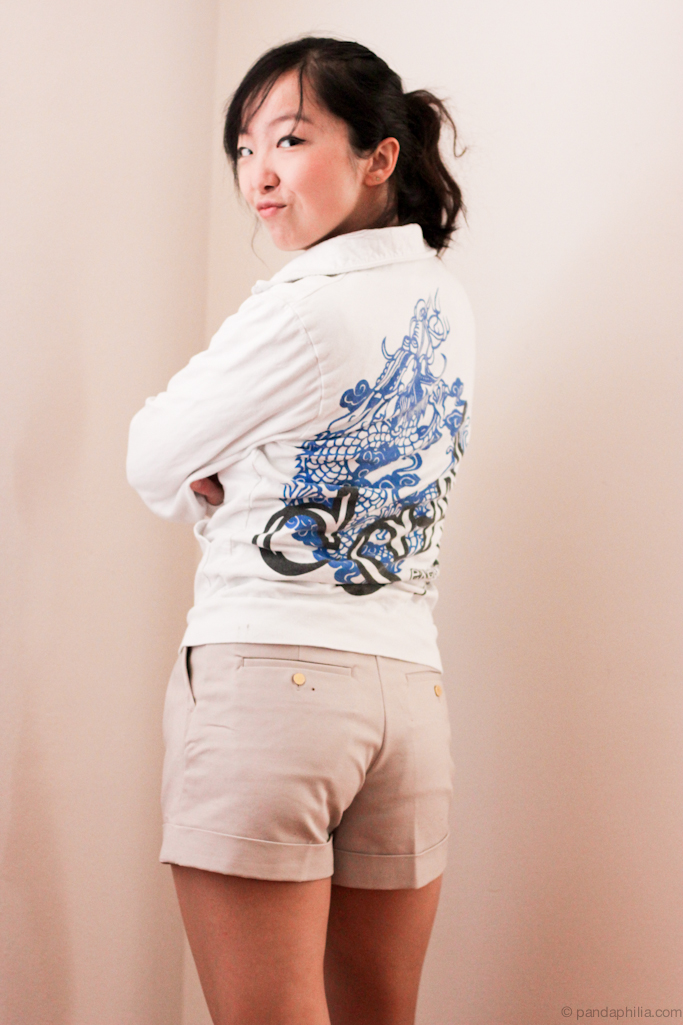
safari guide lets go dragon
A jacket is a lifesaver on chillier days (60 degrees F), especially if biking. I barely even took it off the entire time.
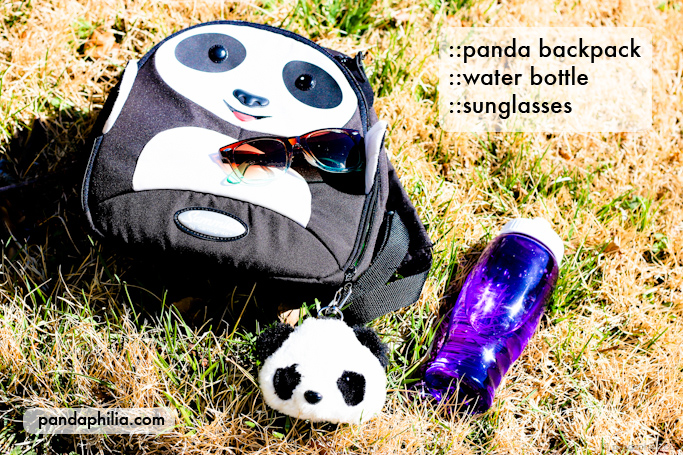
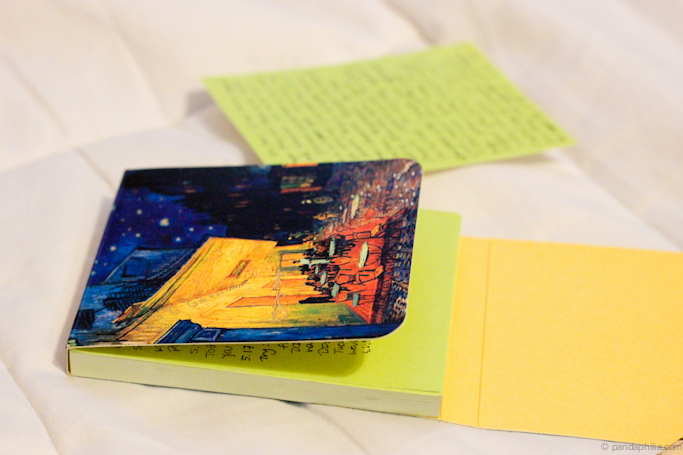
panda pack pandas, roll out! ready to adventure books for notes van gogh thoughts
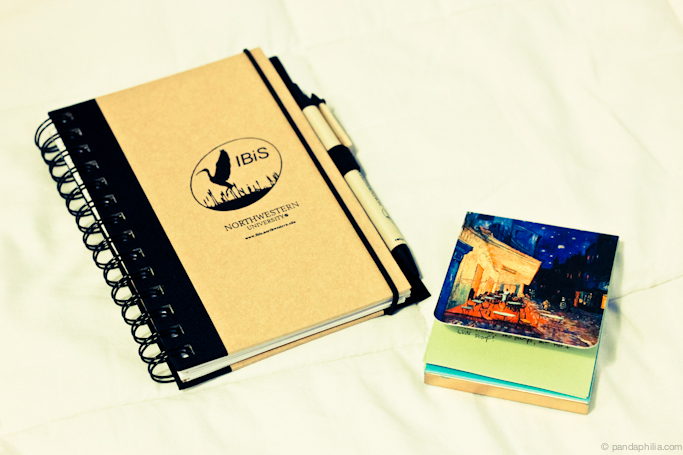
When I'm behind the camera, it's easy to get caught up in the excitement of getting the perfect shot. To savour the fun and experience, I left my camera at home and instead brought some notebooks to scribble exciting memories and moment down in. The small one is from the St. Louis art museum gift shop and the big is a recycled notebook/pen set from JJ's visit to Northwestern.
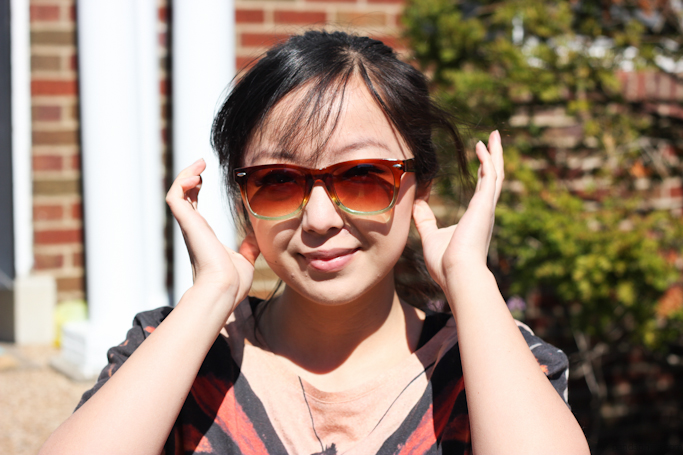
fun bob shades, pow! ready for take off tooch
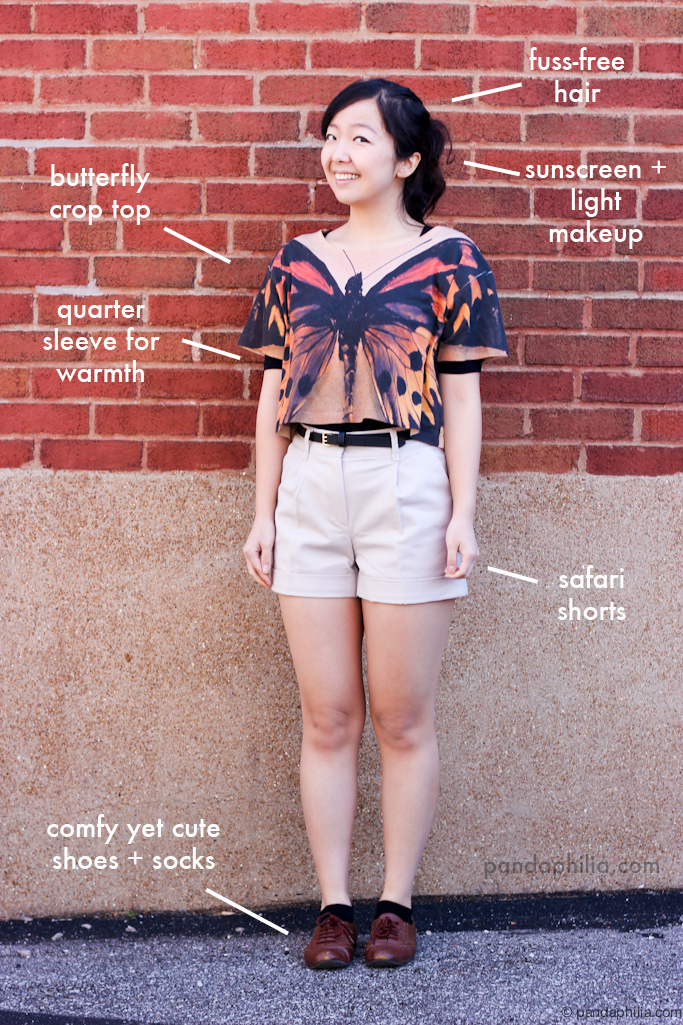
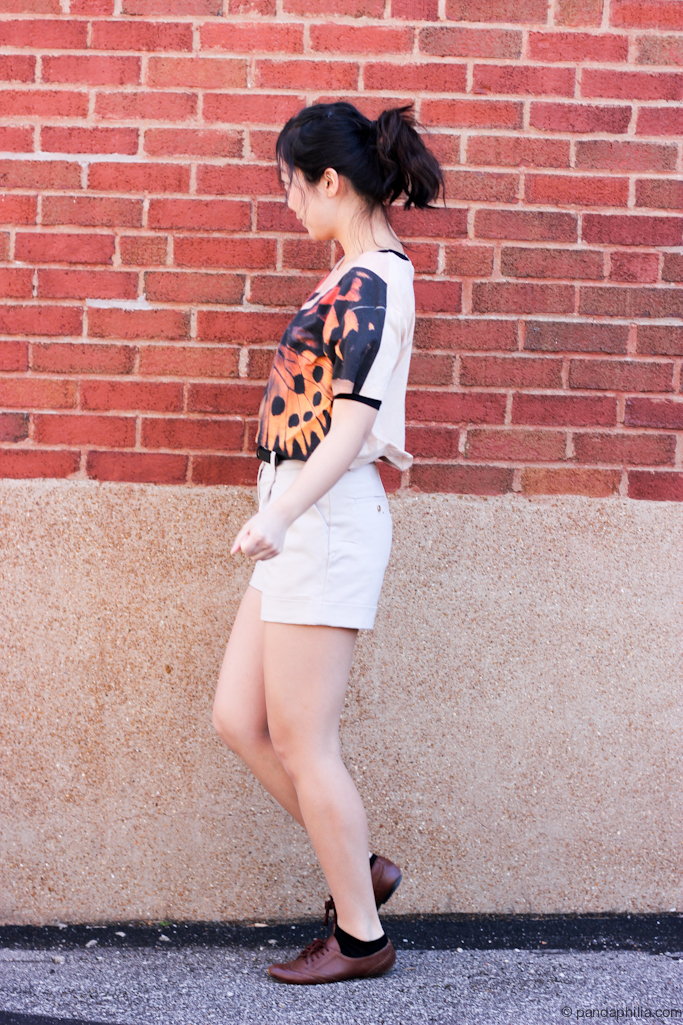
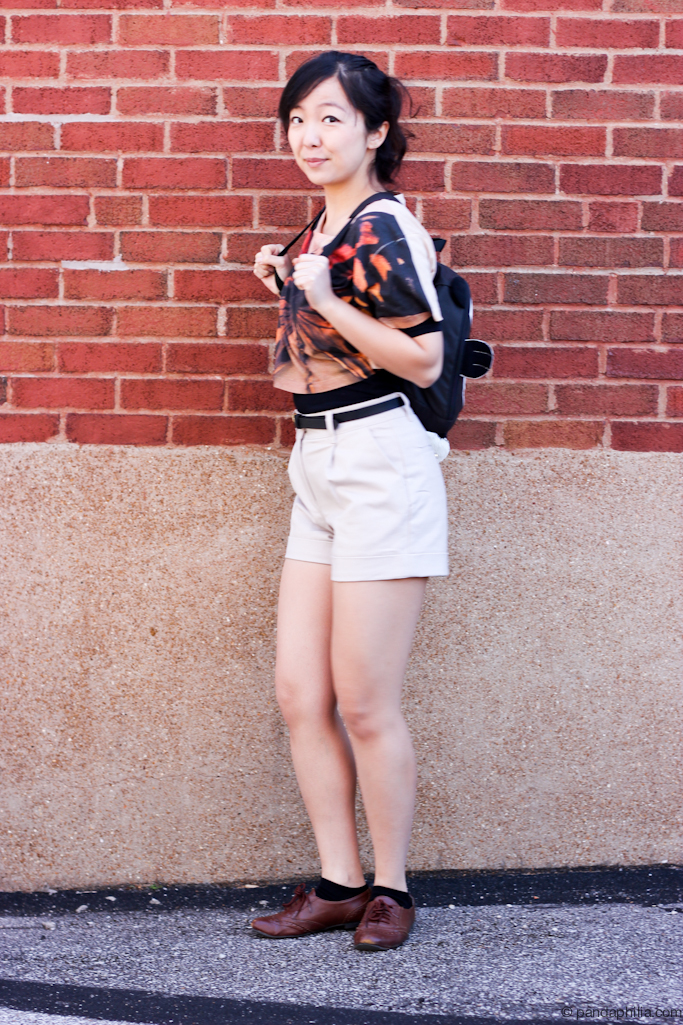
H&M butterfly cropped top (4) // Forever 21 black quarter sleeve underneath (S) // 
H&M khaki cuffed shorts w/ belt (4) // Chinese Students Association dragon jacket //
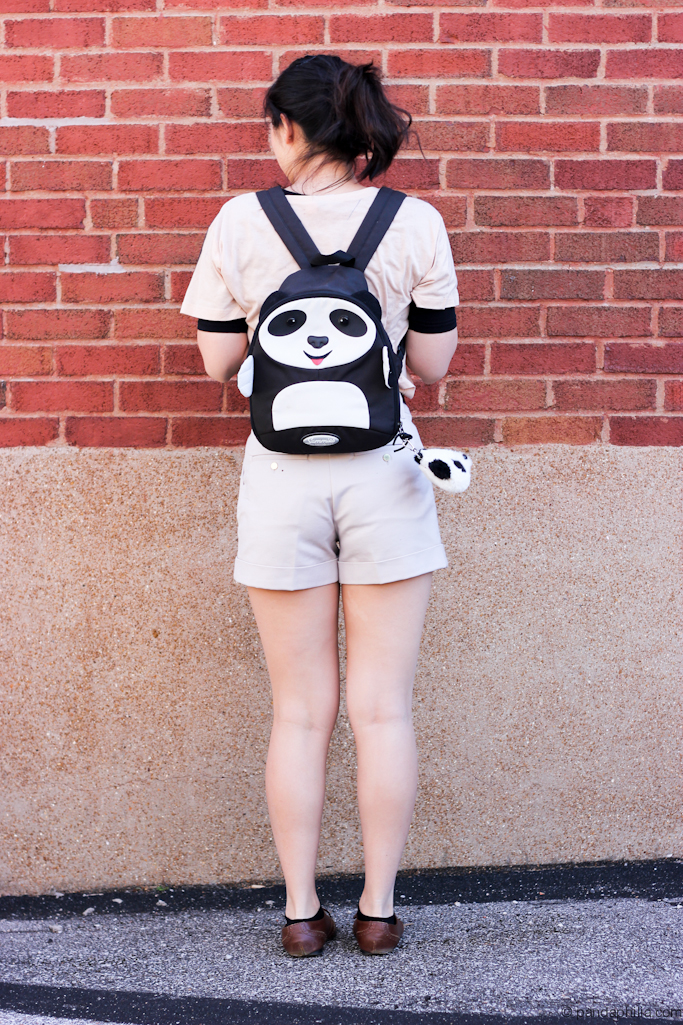
Xhilaration cognac oxford flats (5.5) // Sammies panda backpack (gift from friend) //
Nordstrom BP ombre brown and mint sunglasses //

Photography: JJ

LIONS AND TIGERS AND BEARS. This past Saturday was the first full day of my last college Spring Break and of course, what romantic getaway could we do? A bike trip to the zoo! The St. Louis Zoo is free, which is really nice so we have plenty of lunch money to spend on delish funnel cakes and other obscenely overpriced snacks. Hope you enjoyed this breakdown of how to look cute at the zoo while dressing practically so that your sartorial plumes don't get in the way of your adventures. We had loads of fun guffawing at the penguin gang fight (Gentoos vs Emperors '12) and watching a snake molt. SB2012 - so it begins. Yes we also finished the Lord of the Rings trilogy this week! What a marathon.

Readers - what would you wear to the zoo?
bloglovin
Follow Angie on Twitter

Tuesday, January 17, 2012

Threaded Comment Replies for Custom Templates

If you keep up with Blogger Buzz, you'll know that FINALLY they have threaded comment replies enabled for Blogger (similar to Disqus, how you can reply directly to comments on your posts and have it appear indented like a thread)! You can read the original article. Before, I had inserted a reply button script that allowed me to reply but it wouldn't be attached to the original comment, so that was annoying.

Now you can have threaded comment replies with the touch of a button. Simply go to Blogger Dashboard -> Settings -> Other:  set allow blog feed to "full," then Settings -> Posts and Comments: comment location to "embedded" and voila - everything's set. BUT if you have customized templates like me, things get hairy. I found this very helpful site that's unfortunately in Malay, but with the help of Google Translate, you basically need the first two lines. I'll translate briefly here (code credit: www.themasdoyok.com )

0. Go to Blogger Dashboard -> Template. SAVE YOUR TEMPLATE FIRST ("backup/restore" in upper right corner)
1. Edit html -> Proceed -> check the box that says Expand Widget Templates
2. Control+F and search for this line

<b:include data='post' name='comments'/>
3. Everywhere you see this line above, replace it with this (it appeared 3 times in my code):
<b:if cond='data:post.showThreadedComments'>
<b:include data='post' name='threaded_comments'/>
<b:else/>
<b:include data='post' name='comments'/>
</b:if>
4. Easy, right? It should look something like this:
Lemme know how this works for everyone and happy replying! If only Blogger came up with a better way to notify commenters of replies like Disqus thus and then everything would be peachy.

Readers - what commenting system do you use?
bloglovin
Follow Angie on Twitter

Don't forget to enter my Poshlocket jewelry giveaway!

Tuesday, November 29, 2011

Men's Style: Minimalistic & Polished Winter

My friend Mike S inspired me to consider the other half of the world's population today as we chatted in the library cafe. It's rare that I'll mention Pandaphilia to guys because I only know a handful interested in fashion and of those, most care about promoting their personal style and thus men's fashion. While skirts are my go-to uniform, I know little about the fit and practical styling of guys, so today I'm going to try my hand with a no-frills polished look. Hopefully this will give guys like Mike some inspiration on how to dive into fashion without looking tooo metro or like you're about to hit the runway.

Step 1: Start with the grey H&M cardigan Mike got (on the left). What to wear underneath? 
Others like it: Forever 21 $23 H&M $25 Slub Cotton $49
Step 2: A nice chambray shirt looks great on guys and girls. The thicker texture is great for layering from summer to winter based on the material. It's not quite like denim but has a natural cowboy/outdoorsman rustic vibe to it.
Affordable options: Forever 21 $17 Land's End $33 American Eagle $50 44 Mm $50 (has a hood attached) Ezekiel $60
Step 3: Add pants. Slim fit straight leg rather than skin-tight looks best for those with thin legs. Chinos are a good option and remember, dark washes are always slimming. My experience is that H&M has a lot of nice casual/work hybrid pants that have been successful with JJ, who is definitely a no-frills comfort-first dresser.
Try these on for size: H&M $35
Step 4: Finish off with masculine boots. Combat boots have always caught my attention and they're warm and stylish for colder winter days. Thrift stores are the way to go if you want cheap ones. You switch out the shoes. If you're going for polished, skip the sneaks and opt for leather or faux leather.
Ideas for kicks: Sears $45 H&M $60 Nommad $130 
The finished look, using H&M's interactive models: The collar's a bit different but you get the idea. Throw on a belt and your favourite coat and you're good to go for winter days. Feel free to get creative and build - with a chunky scarf, a skinny tie, etc.
I'd love your feedback on this stylist's attempt. Guys - would you wear this? Girls - would you like this on a guy?
bloglovin
Follow Angie on Twitter

Friday, July 23, 2010

Polished: Spot-On Leopard Print Mani Tutorial

RAWR! I know I've been gone for ever and a day because of MCAT, but I can't resist putting up a new post and fighting stagnancy. I finally finished all the review materials, have 4 compositions full of handwritten, painstakingly-taken notes. Right now I'm just blitzing through the 1001 Problems books, which means over 5000 problems by the time I'm done studying. Is this all possible within 14 days? I sure hope so, because ready or not, the MCAT is coming. Dun dun dun! It makes me feel better that a potential failsafe school only requires a mere 21 for admissions ... so at least I can get into SOME med school : )

Also, I've changed up things a little bit while I was gone. I added links into the linkbar, wrote an About Angie page, shortened my posts on the main page with Suzy's help, and made the "Click to see more photos" link more noticeable by fixing the background colour (thanks to Jean and AN). Blogger friends really are the best :D Coding wizards to the rescue! What I want to know is what you guys think of the shortened posts. I know I'm the queen of picspam, but I think that was a characteristic of my blog. Lots and lots of huge pictures and building up your scrolling skills. However, it does clean up the site a lot. Please vote in my poll above - I'm considering changing it back to unshortened because I personally am too lazy to click the "read more" button most of the time if I'm not at the direct post. I've left this post unshortened for testing. Please see my main page for a feel of the shortened posts.

I first got the inspiration to do this mani from Lisa of LisaDrivesaVan (see her version here). I haven't really been into leopard prints because I think they look kind of tacky and too club-goer for daily wear but who says you can't put a little ferocious feline into your nails? I was going to do a makeup look to complement this mani but that day it was a sauna outside - at that temperature it'd only melt off. I've been doing random looks though and taking pics : ) They will all be posted after 8/5, Judgment Day. I will also get back to all your sweet comments too.

Wet n Wild Craze in Goldmine, 3 coats
Maybelline Express Finish in Mink in a Moment (dots)
Wet n Wild H2O Proof Liquid Eyeliner in Black (squigglies)
Sanofi Aventis Topcoat, 2 coats

Sunshine:
My crazy leonine hair
 Shade:
At first I was afraid that I didn't have the right colours and that the base coat would be too yellow, but it turns out a nice and warm gold when opaque. If you like what you see, try your hand at it by following the picture tutorial I made :D It was so hard trying to take pics with my left hand while not smudging the polish I just painted on the right hahaha.

Spot-On Leopard Print Mani Tutorial

Step 1: Start off with clean nails. Remove your nail polish, let the acetone dry, wash your hands, etc. If you want, apply base coat. I'm not that fancy though.
Step 2: Apply base colour until it becomes opaque. I'm using Wet n Wild Craze in Goldmine, with 3 coats for it to become the opacity I wanted. It's a very yellowish gold colour.
I absolutely love these Craze nail polishes because their brushes are so short so you don't have to flail around to apply. They deposit polish evenly and the formula dries fast. Perfect! These are only $1.99 USD each at drugstores - super awesome deal. I just love cute packaging too!
Step 3: Apply dot shade randomly. You don't have to be perfect! Draw kidney shaped little things or dots or hearts whatever you want - it's going to be covered with the black polish/eyeliner later. I'm using a super old bottle of Maybelline Express Finish in Mink in a Moment I got with a magazine subscription in like ... 7th grade HAHAHA.
Now it looks like giraffes!
 
Step 4: This is easier than it looks! I'll break it down in the pictures below. Draw squiggly C's around the dots you made. Be messy! I'm using Wet n Wild H2O Proof Eyeliner in Black (yes, waterproof eyeliner - a tip from Lisa) because the tip of the wand has a lot more control than flimsy nail art polish brushes. If you have the pro materials, go for it. Otherwise, you can choose a cheap eyeliner you don't use anymore and use it as an alternative. I suggest you don't use that eyeliner on your eyes after this.
 The top nail is in the process. I just made a C wrapping the brown dot I made earlier.
 And I made another C on the other side. Leave some gaps!
I really love this eyeliner too ... I'll have to pick up another one because I used it for this mani and plus it's drying out xD The tip might get destroyed after you use it on your nails.
Step 5: Be very careful! Gently glide topcoat over the nail. Use a super light hand and let the first coat dry before applying another layer. It will smudge a little but that's okay! I'm using Sanofi Aventis topcoat .. very random one I found in the drawer. If you press down hard with the brush, it will smear like on my pinky nail and end up not-so-pretty. Barely touch the brush to the nail and let the topcoat kind of drip down.
From a distance, you can't tell there are smudges or smears at all : ) After a few days the eyeliner will start to wear off if the topcoat chips. My nails have lasted for over a week now and they look fine. Enjoy your new hot leopard print nails! Feel free to use different colours. I went for a conservative (if you could call it that) colour palette. I've seen cute snow leopard ones, or hot pink and turquoise, etc. Have fun!
I leave you with some art I did years ago. Very suitable for this post, eh? I titled it "Savage" - animals were and probably always will be my favourite to draw. I'm going to run along and get back to cramming! Please tell me what you feel about the shortened posts in the meantime. Muah! ♥

Related Posts Plugin for WordPress, Blogger...